1. Introduction
1.1. Motivation
Linux users are often required to switch to a Windows environment for using OS-restricted software such as Microsoft Office and VPN software. Although there are some options to use Windows from Linux, they are not comfortable enough and often stressful to use.
Linux / Windows dual boot configuration is the most simple solution. However, it is required to reboot the computer. Remote desktop to a Windows host is another basic solution, but it is not comfortable or even unable to use when the network is slow or disconnected. Creating Windows VM on Linux is another solution, however, it is often stressful because of its poor performance, especially under graphics-related use cases. Wine is also another solution, but some Windows applications are not yet stable enough.
So I decided to find the most stress-free Windows environment. This article introduces the result and demonstrates how to set up a Windows environment with Intel HD Graphics on a virtual machine using Linux KVM. Although I tested it on my Gentoo Linux environment, it must work on other Linux distributions.
1.2. Hardware and software configurations
The following table shows hardware configurations used in this article. Note that the Intel GVT-g technology requires Intel Core processors with Intel HD Graphics (>= 5th generation, Broadwell architecture).
| PC Model | Lenovo ThinkPad X1 Carbon 6th Gen (2018) |
| UEFI | N23ET75W (1.50) |
| Firmware | 1.22 |
| CPU | Intel(R) Core(TM) i7-8650U CPU @ 1.90GHz |
| Memory | LPDDR3 8192MB 2133MT/s x 2 modules (total 16GB) |
| Disk | WDC PC SN720 SDAQNTW-256G-1001 (M.2 NVMe SSD) |
The next table describes software configurations. The Xorg runs with the modesetting driver for stability (see this article). Since the driver does not support the TearFree option in xorg.conf, I use picom as composite manager. It provides a vsync option for a tear-free and smooth screen. Unfortunately, the default QEMU does not support 60 fps output via DMA-Buf, so I applied the 60fps-patch for a better graphics experience (see this issue).
| OS | Gentoo Linux, Kernel 5.10.27 |
| Display Server | X.Org X Server 1.20.11 (with modesetting driver) |
| OpenGL | mesa 20.3.5 |
| Window manager | awesome 4.3-r101 |
| Composite man | picom 8-r1 |
| Sound Server | PuseAudio 13.0-r1 |
| Virtualization | QEMU 5.2.0-r2 (with the 60fps-patch applied) Libvirt 7.0.0-r1 |
Since the screen vsync is managed by picom, ~/.drirc has the following lines to set vblank_mode=1 to all applications. This configuration could prevent DMA-Buf rendering delay under virt-manager (this is independent of the low frame rate issue).
<driconf>
  <device screen="0">
    <application name="all">
      <option name="vblank_mode" value="1"/>
    </application>
  </device>
</driconf>
2. Host Setup
2.1. Linux kernel config
The following kernel configs need to be enabled. In my environment, they are built into the kernel (=y). Some distributions other than Gentoo Linux may have corresponding packages.
- VFIO_MDEV
- VFIO_DEVICE
- VFIO_IOMMU_TYPE1
- INTEL_IOMMU
- DRM_I915_GVT
- DRM_I915_GVT_KVMGT
2.2. Kernel boot options
Following options need to append to GRUB_CMDLINE_LINUX_DEFAULT in /etc/default/grub.
- intel_iommu=on
- i915.enable_gvt=1
- kvm.ignore_msrs=1
- i915.enable_guc=0
The configurations will be applied by regenerating grub.cfg and reboot the computer.
sudo grub-mkconfig -o /boot/grub/grub.cfg
sudo reboot
2.3. Build QEMU with 60fps patch
A virtual GPU attached to a VM outputs the screen to a DMA-Buf. However, the default QEMU supports up to 33-34Hz of the refresh rate. The refresh rate could be updated by applying the following patch. Gentoo’s portage applies user patches located in /etc/portage/patches, so save the patch at /etc/portage/patches/app-emulation/qemu/GUI_REFRESH_INTERVAL_DEFAULT.patch and rebuild the qemu. The patch could also be found at qemu-60fps (AUR).
diff --unified --recursive --text qemu-4.2.0/include/ui/console.h qemu-4.2.0.new/include/ui/console.h
--- qemu-4.2.0/include/ui/console.h    2019-12-12 13:20:48.000000000 -0500
+++ qemu-4.2.0.new/include/ui/console.h    2020-04-07 14:50:19.995242274 -0400
@@ -26,7 +26,7 @@
 #define QEMU_CAPS_LOCK_LED   (1 << 2)

 /* in ms */
-#define GUI_REFRESH_INTERVAL_DEFAULT    30
+#define GUI_REFRESH_INTERVAL_DEFAULT    16
 #define GUI_REFRESH_INTERVAL_IDLE     3000

 /* Color number is match to standard vga palette */
sudo emerge -av qemu3. Guest Setup
3.1. Create a virtual GPU via sysfs
After the set up of Intel GVT-g, the “mdev_supported_types” directory will appear like the following example. Its sub-directories contain “description” files that have information about the virtual GPU.
$ lspci | grep VGA
00:02.0 VGA compatible controller: Intel Corporation UHD Graphics 620 (rev 07)

$ ls /sys/bus/pci/devices/0000:00:02.0/mdev_supported_types
i915-GVTg_V5_4/  i915-GVTg_V5_8/

$ ls /sys/bus/pci/devices/0000:00:02.0/mdev_supported_types/i915-GVTg_V5_4
available_instances  create  description  device_api  devices/

$ cat /sys/bus/pci/devices/0000:00:02.0/mdev_supported_types/i915-GVTg_V5_4/description
low_gm_size: 128MB
high_gm_size: 512MB
fence: 4
resolution: 1920x1200
weight: 4
The virtual GPUs are managed via the sysfs. Writing a UUID string to the “create” file will create a virtual GPU. The UUID must be set to the VM’s XML configurations described in the next subsection.
$ echo 00000000-0000-0000-0000-000000000000 | \
  sudo tee /sys/devices/pci0000\:00/0000\:00\:02.0/mdev_supported_types/i915-GVTg_V5_4/create

$ ls /sys/bus/pci/devices/0000:00:02.0/00000000-0000-0000-0000-000000000000
driver@      iommu_group@  power/  subsystem@
intel_vgpu/  mdev_type@    remove  uevent
Writing 1 to the “remove” file at the following directory will remove the virtual GPU.
$ echo 1 | sudo tee /sys/bus/pci/devices/0000:00:02.0/00000000-0000-0000-0000-000000000000/remove

$ ls /sys/bus/pci/devices/0000:00:02.0/00000000-0000-0000-0000-000000000000
ls: cannot access '/sys/bus/pci/devices/0000:00:02.0/00000000-0000-0000-0000-000000000000': No such file or directory
3.2. Create a VM and set up Windows 10
The installation procedure contains something like the following steps. Note that it is required to set a modified version of a romfile named vbios_gvt_uefi.rom to the virtual GPU when creating an OVMF / UEFI-based VM. It seems the romfile has not been published on the original site anymore, but its archive could be downloaded from this page.
- Launch virt-manager and open the “New Virtual Machine” wizard.
- Enable checkbox labeled “Customize configurations before install” at the last step of the wizard.
- Modify the libvirt XML to something like the following example and check file paths and the UUID of the virtual GPU are correct for your environment. The example XML contains options for performance tuning.
- Start installing Windows 10 to the VM. It requires switching an ISO media to load a driver to detect the virtio disks. The driver ISO media could be downloaded from this page. I use virtio-win-0.1.190.iso (latest version).
- After the OS installation, install the virtio driver (run virtio-win-gt-x64.msi) from the driver ISO media of the previous step. I do not recommend installing the virtio-win-guest-tools.exe because it drops the refresh rate of the mouse pointer.
- Finally, apply the Windows Update that automatically detects hardware configurations and installs the Intel HD Graphics driver. After that, you will see a FullHD display.
<domain xmlns:qemu="http://libvirt.org/schemas/domain/qemu/1.0" type="kvm">
<name>win10</name>
<uuid>9dc496f4-a10a-46c4-b8f6-3386cbe4d0a0</uuid>
<metadata>
<libosinfo:libosinfo xmlns:libosinfo="http://libosinfo.org/xmlns/libvirt/domain/1.0">
<libosinfo:os id="http://microsoft.com/win/10"/>
</libosinfo:libosinfo>
</metadata>
<memory>8388608</memory>
<currentMemory>8388608</currentMemory>
<vcpu placement="static">4</vcpu>
<iothreads>1</iothreads>
<cputune>
<quota>-1</quota>
<emulator_quota>-1</emulator_quota>
<vcpupin vcpu="0" cpuset="2"/>
<vcpupin vcpu="1" cpuset="3"/>
<vcpupin vcpu="2" cpuset="6"/>
<vcpupin vcpu="3" cpuset="7"/>
<emulatorpin cpuset="1,5"/>
<iothreadpin iothread="1" cpuset="1,5"/>
</cputune>
<numatune>
<memory mode="strict" placement="auto"/>
</numatune>
<os>
<type arch="x86_64" machine="q35">hvm</type>
<loader readonly="yes" type="pflash">/usr/share/qemu/edk2-x86_64-secure-code.fd</loader>
</os>
<features>
<acpi/>
<apic/>
<hyperv>
<relaxed state="on"/>
<vapic state="on"/>
<spinlocks state="on" retries="8191"/>
<vpindex state="on"/>
<runtime state="on"/>
<synic state="on"/>
<stimer state="on">
<direct state="on"/>
</stimer>
<reset state="on"/>
<vendor_id state="on" value="1234567890ab"/>
<frequencies state="on"/>
<ipi state="on"/>
<evmcs state="on"/>
</hyperv>
<vmport state="off"/>
</features>
<cpu mode="host-passthrough" check="full" migratable="off">
<topology sockets="1" cores="2" threads="2"/>
<cache mode="passthrough"/>
</cpu>
<clock offset="localtime">
<timer name="rtc" tickpolicy="catchup"/>
<timer name="pit" tickpolicy="delay"/>
<timer name="hpet" present="no"/>
<timer name="hypervclock" present="yes"/>
</clock>
<pm>
<suspend-to-mem enabled="no"/>
<suspend-to-disk enabled="no"/>
</pm>
<devices>
<emulator>/usr/bin/qemu-system-x86_64</emulator>
<disk type="file" device="disk">
<driver name="qemu" type="qcow2"/>
<source file="/virt/disk/win10.qcow2"/>
<target dev="vda" bus="virtio"/>
<boot order="2"/>
</disk>
<disk type="file" device="cdrom">
<driver name="qemu" type="raw"/>
<source file="/virt/iso/Win10_20H2_v2_Japanese_x64.iso"/>
<target dev="sdb" bus="sata"/>
<readonly/>
<boot order="1"/>
</disk>
<controller type="usb" model="qemu-xhci" ports="15"/>
<interface type="network">
<source network="default"/>
<mac address="52:54:00:d9:cc:e3"/>
<model type="virtio"/>
</interface>
<console type="pty"/>
<channel type="spicevmc">
<target type="virtio" name="com.redhat.spice.0"/>
</channel>
<graphics type="spice">
<image compression="off"/>
<jpeg compression="never"/>
<zlib compression="never"/>
<playback compression="off"/>
<gl enable="yes" rendernode="/dev/dri/by-path/pci-0000:00:02.0-render"/>
<listen type="none"/>
</graphics>
<sound model="ich9"/>
<video>
<model type="none"/>
</video>
<hostdev mode="subsystem" type="mdev" managed="no" model="vfio-pci" display="off">
<source>
<address uuid="00000000-0000-0000-0000-000000000000"/>
</source>
<address type="pci" domain="0x0000" bus="0x00" slot="0x04" function="0x0"/>
</hostdev>
<redirdev bus="usb" type="spicevmc"/>
<redirdev bus="usb" type="spicevmc"/>
<iommu model="intel">
<driver caching_mode="on" iotlb="on"/>
</iommu>
<input type="tablet" bus="virtio"/>
<redirdev bus="usb" type="spicevmc"/>
<redirdev bus="usb" type="spicevmc"/>
</devices>
<qemu:commandline>
<qemu:arg value="-set"/>
<qemu:arg value="device.hostdev0.ramfb=on"/>
<qemu:arg value="-set"/>
<qemu:arg value="device.hostdev0.display=on"/>
<qemu:arg value="-set"/>
<qemu:arg value="device.hostdev0.x-igd-opregion=on"/>
<qemu:arg value="-set"/>
<qemu:arg value="device.hostdev0.driver=vfio-pci-nohotplug"/>
<qemu:arg value="-set"/>
<qemu:arg value="device.hostdev0.romfile=/virt/firmware/vbios_gvt_uefi.rom"/>
<qemu:arg value="-set"/>
<qemu:arg value="device.hostdev0.xres=1920"/>
<qemu:arg value="-set"/>
<qemu:arg value="device.hostdev0.yres=1080"/>
<qemu:env name="QEMU_AUDIO_DRV" value="spice"/>
<qemu:env name="MESA_LOADER_DRIVER_OVERRIDE" value="i965"/>
<qemu:env name="INTEL_DEBUG" value="norbc"/>
</qemu:commandline>
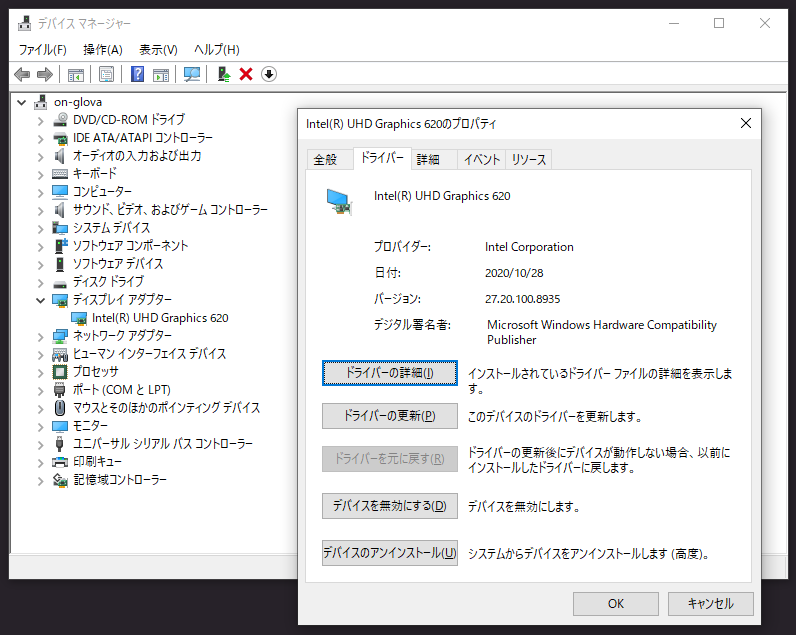
</domain>After applying Windows Update, you can see Intel HD Graphics on the device manager. Its property will show the driver provider is Intel Corporation.
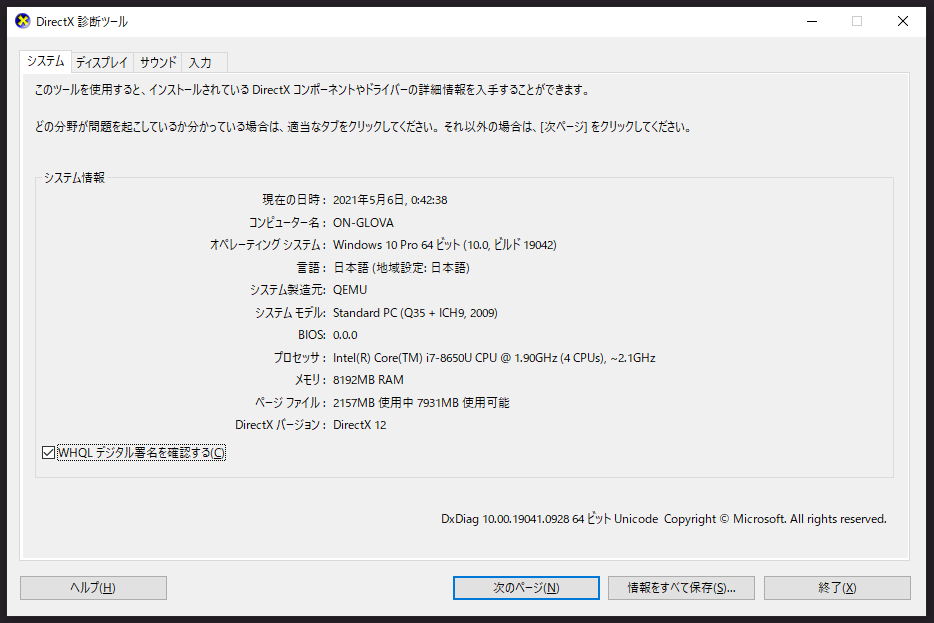
The dxdiag shows the DirectX 12 is available.
Google Chrome also detects the virtual GPU. It could use the hardware accelerations using the GPU.

4. Inspecting the Graphics Performance
4.1. Final Fantasy XIV (moderate 3D gaming workload)
The Final Fantasy XIV benchmark scores 2,062 under 1280×720 window mode with the standard graphics quality for laptops. Its frame rate is 14.6 fps on average, so it is hard to play the 3D game in this environment. However, under a low graphics load and without a need for quick responses such as character creation mode, its performance is enough (even still feels the low frame rate). Note that the native gaming performance on the same host (without virtualization) scores 3,187 and 24.0 fps on average. It seems the effective graphics performance degrades about 36-39% with virtualization.


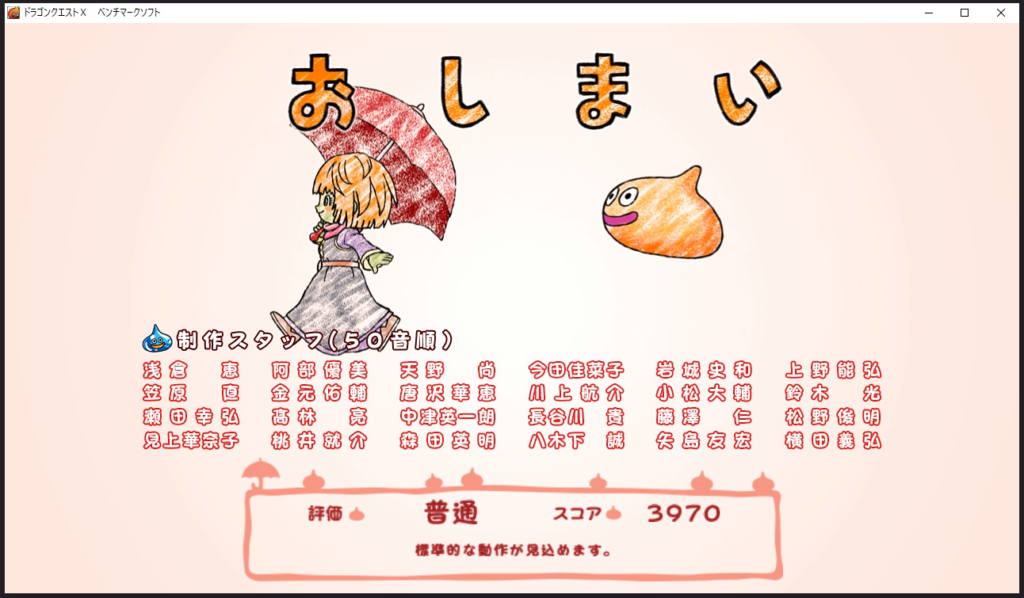
4.2. Dragon Quest X (lightweight 3D gaming workload)
Relatively lightweight 3D games such as Dragon Quest X may be playable. The benchmark under 1280×720 window mode with the standard graphics quality scores 3,970. Throughout the benchmark, it was clear that the frame rate is more smooth than that of the FFXIV benchmark.
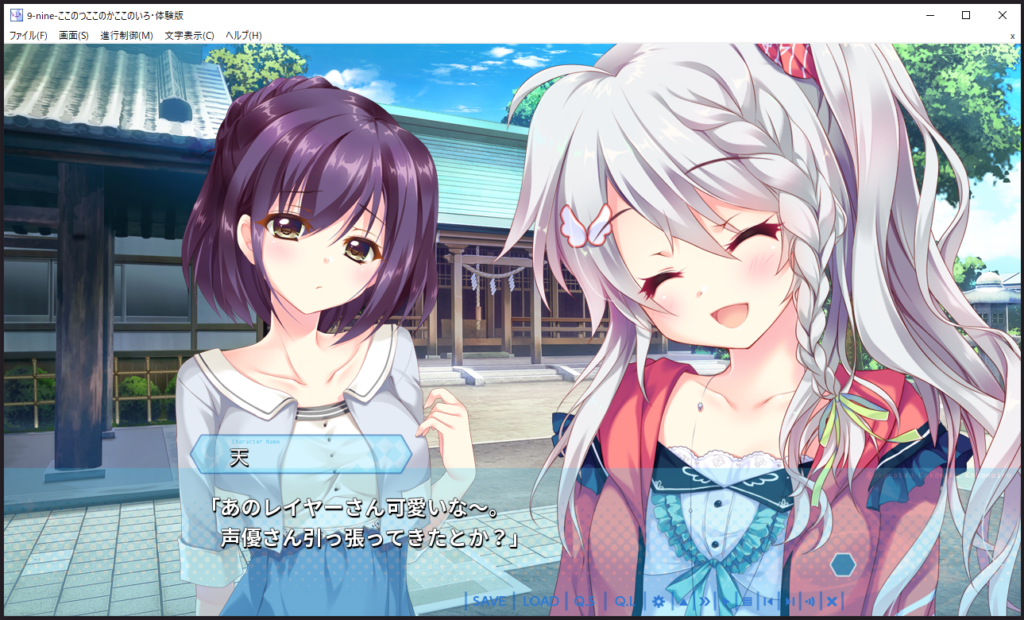
4.3. 2D graphics games
2D graphics novel games work with no stress.
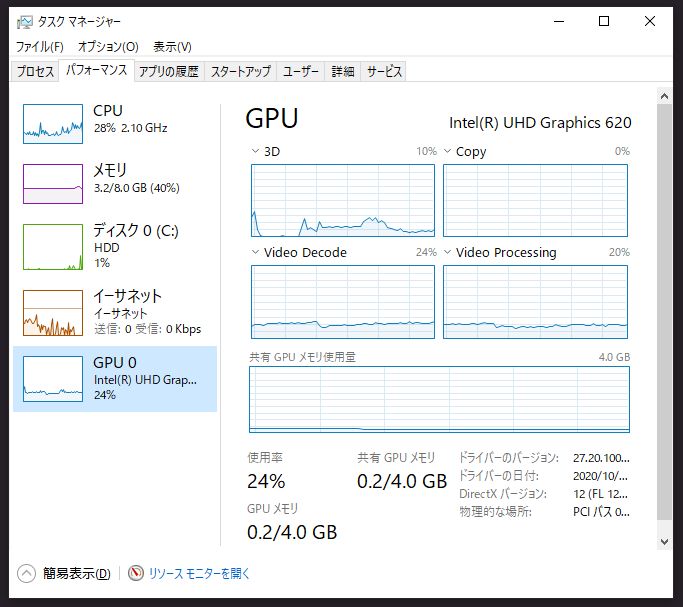
4.4. YouTube video playback frame rate
The video playback frame rate is smooth enough for 1080p / 60fps contents. According to the screenshot, the statistics of the HTML5 video player describe 1,204 dropped of 9,592 frames. It seems the actual frame rate is about 52.5 fps (= (1 – 1204 / 9592) * 60). There is no problem with the audio and video synchronization.

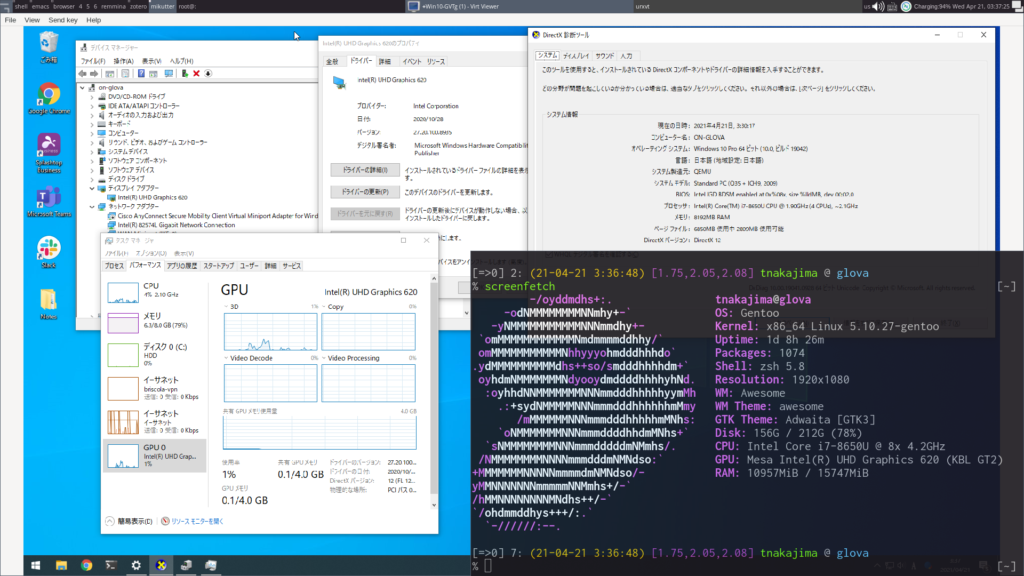
The following image shows the GPU utilization when playing a 1080p / 60fps video on YouTube with Google Chrome. According to the task manager, the GPU utilization is around 20-25% for the hardware acceleration of the video playback.
5. Conclusion
This article demonstrated the Windows 10 VM set up with a virtual GPU by Intel GVT-g on Linux KVM and showed some benchmark results and video playback frame rate. The virtual GPUs could be managed via the sysfs and attached to the VM by modifying the libvirt XML. After the Windows 10 installation, virtio drivers and Windows Update are applied that contain the Intel HD Graphics driver. Its performance is enough for 2D use cases. Lightweight 3D graphics may also work.
References
About Intel GVT-g technology itself
- An Introduction to Intel GVT-g (with new architecture)
- Bringing New Use Cases and Workloads to the Cloud with Intel® Graphics Virtualization Technology (Intel® GVT-g)